Branch & pull request

An overview of the GitHub flow, branch & pull request system for better team collaboration.

Goal

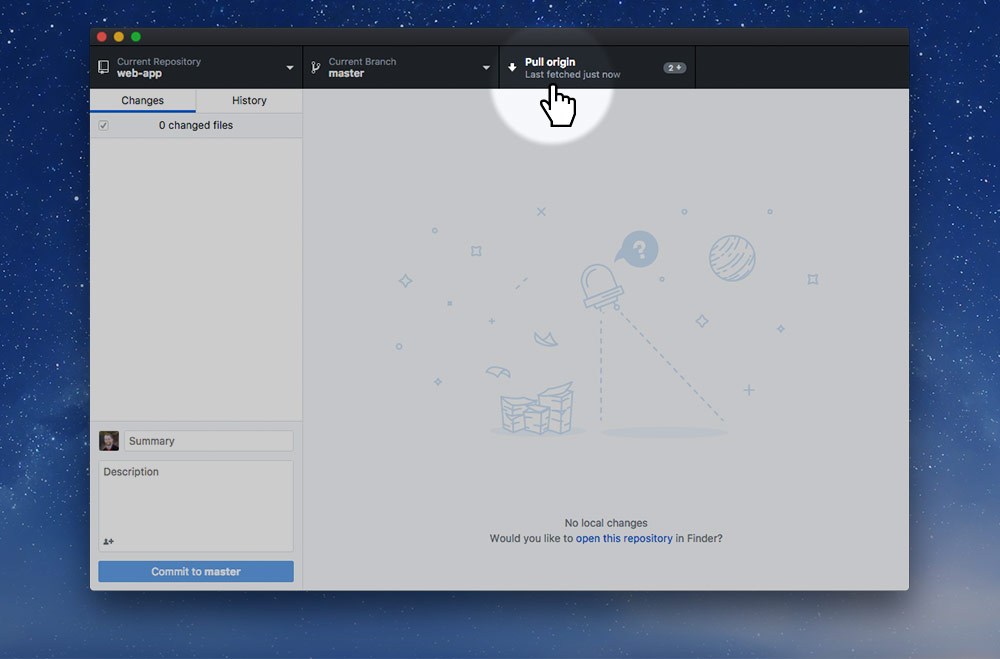
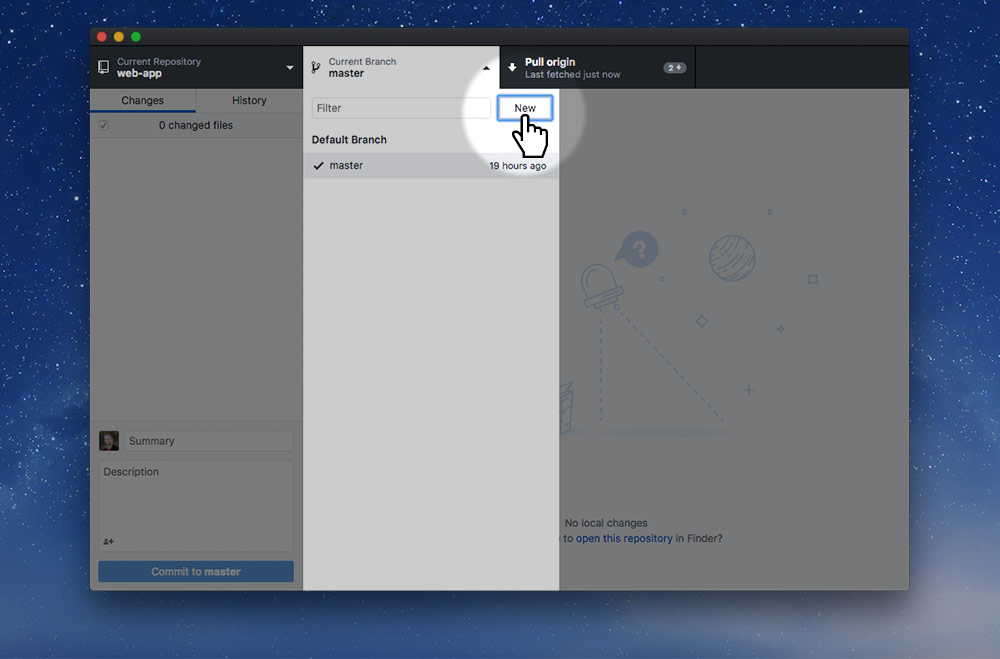
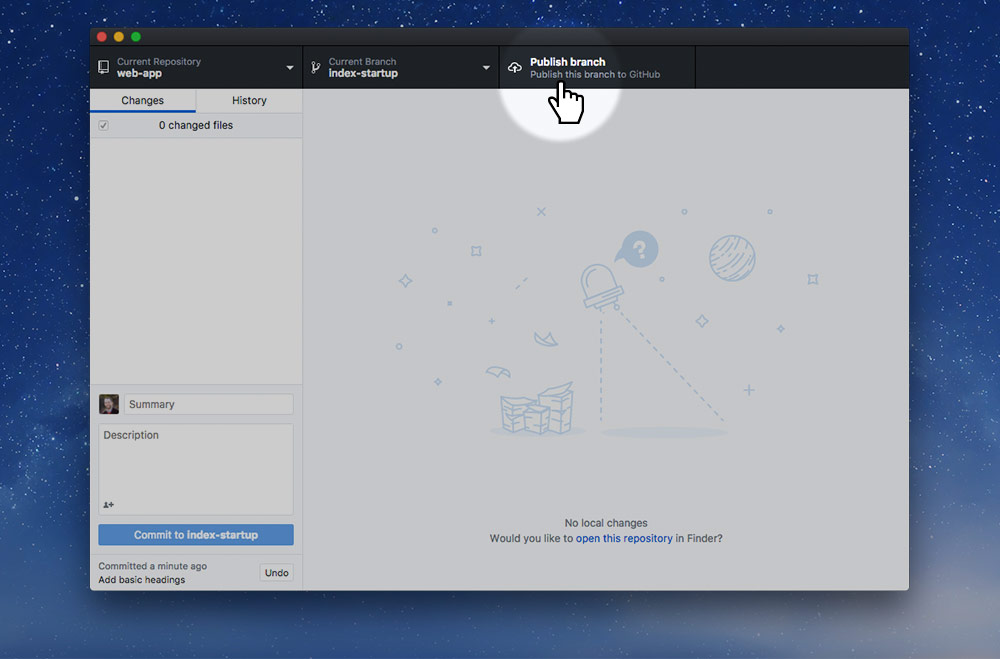
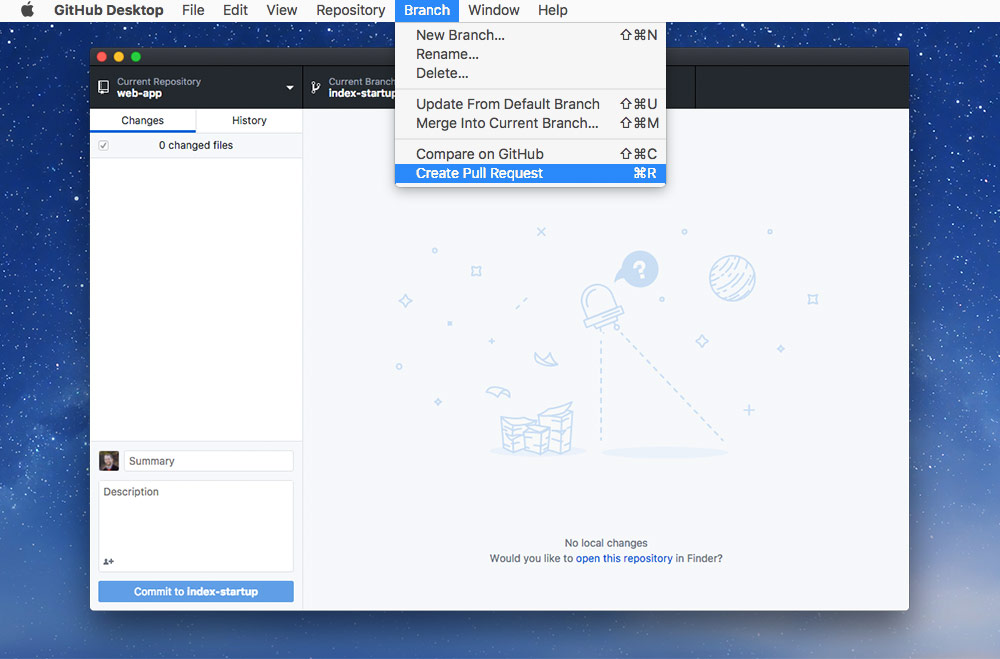
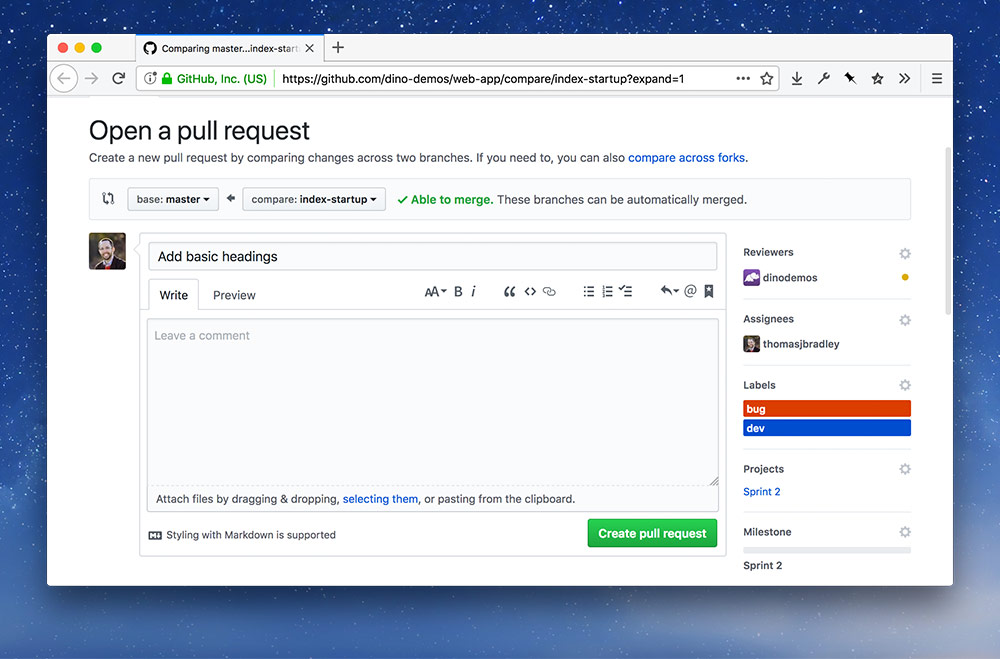
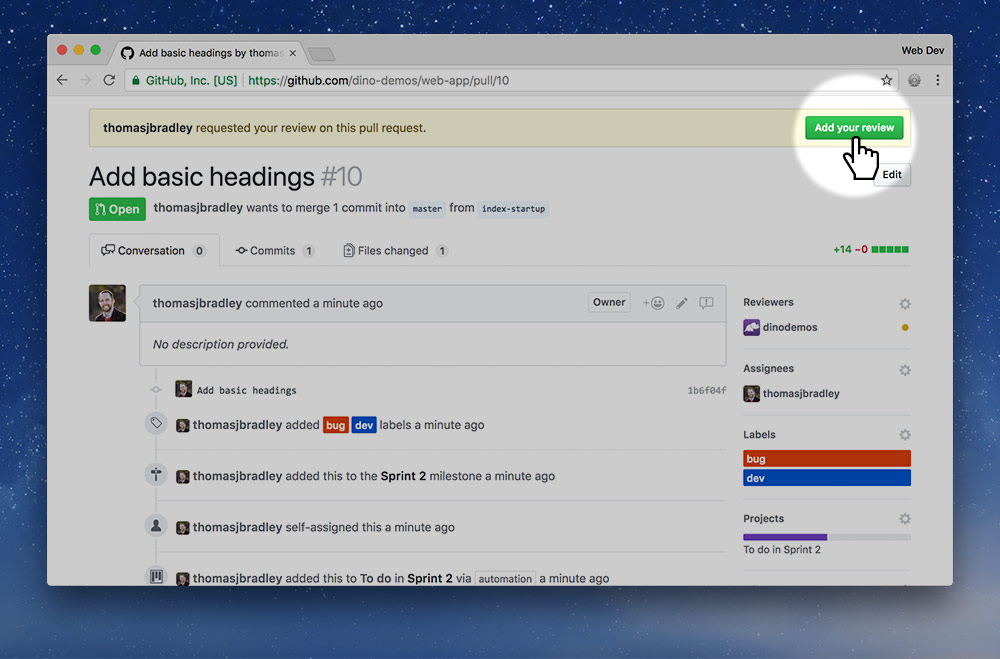
This lesson is going to walk through using the branch & pull request method for working with code on teams. Our master branch is protected because it represents a pristine copy of our live web application. We need to create branches & pull requests to get permission from our teammates to launch our code into the pristine, live master branch.

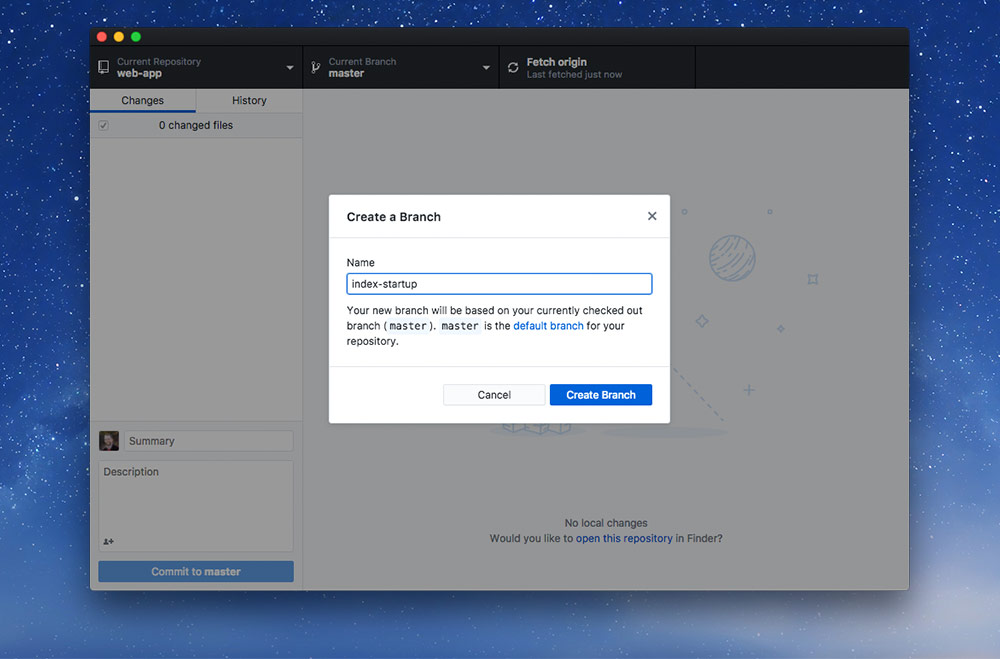
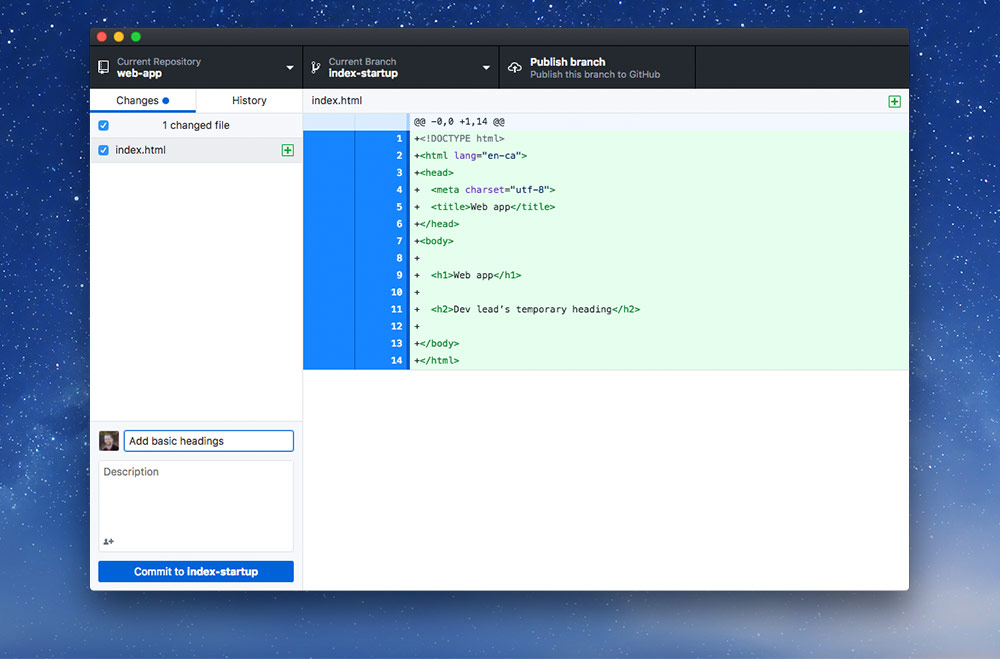
We’ll be using this process for every small feature we add to the project—make sure that each feature also has an assigned Issue.

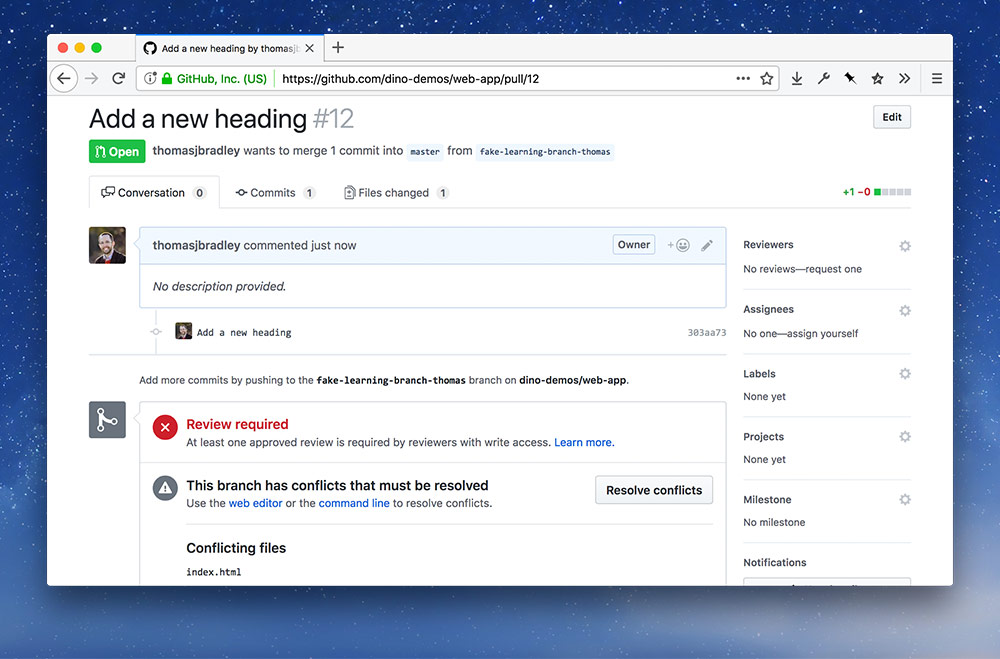
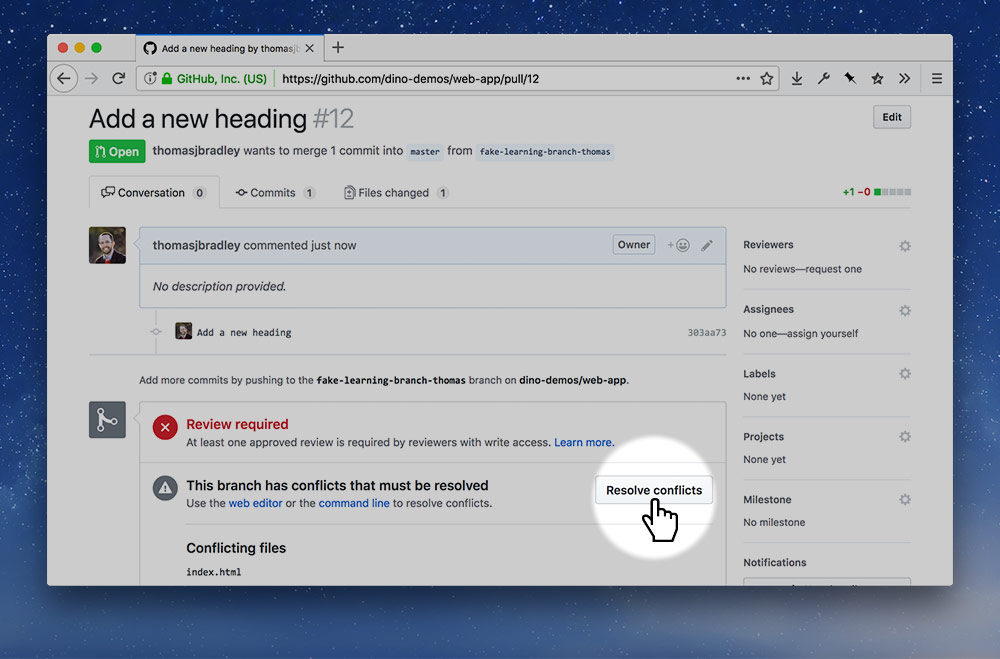
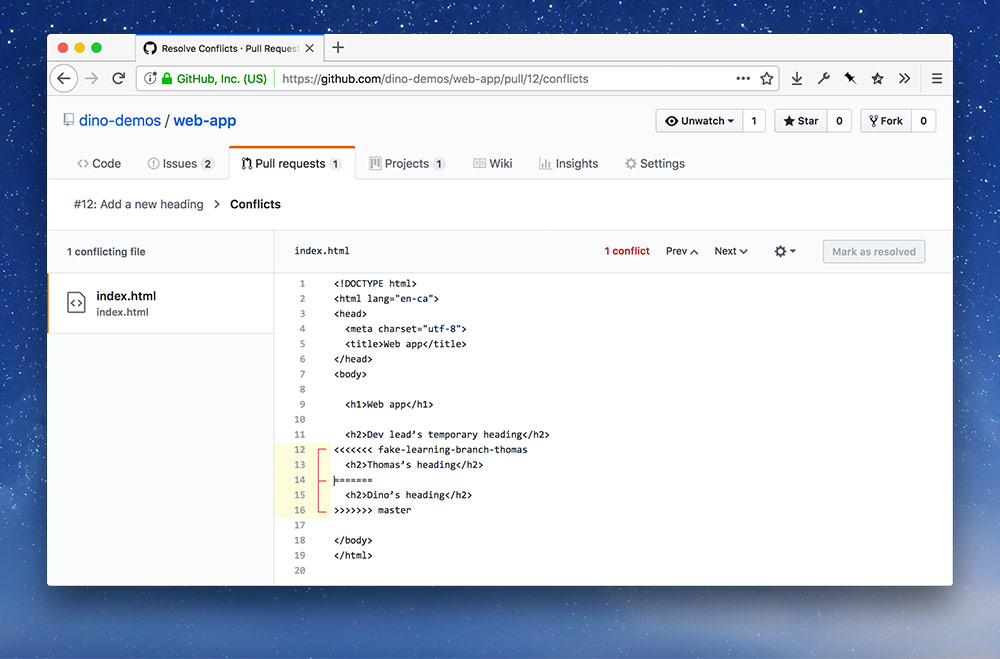
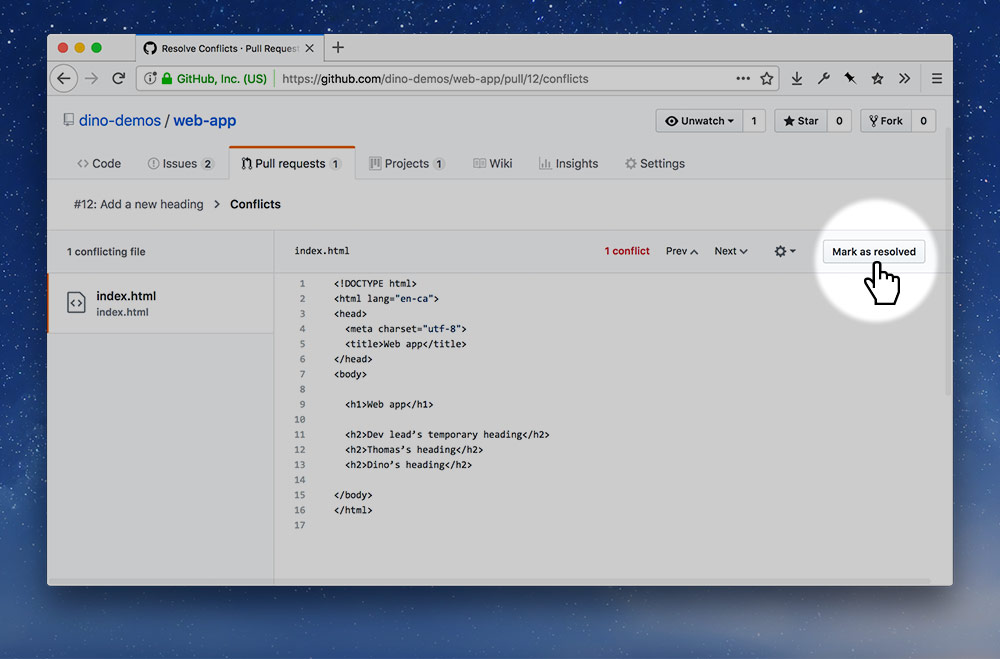
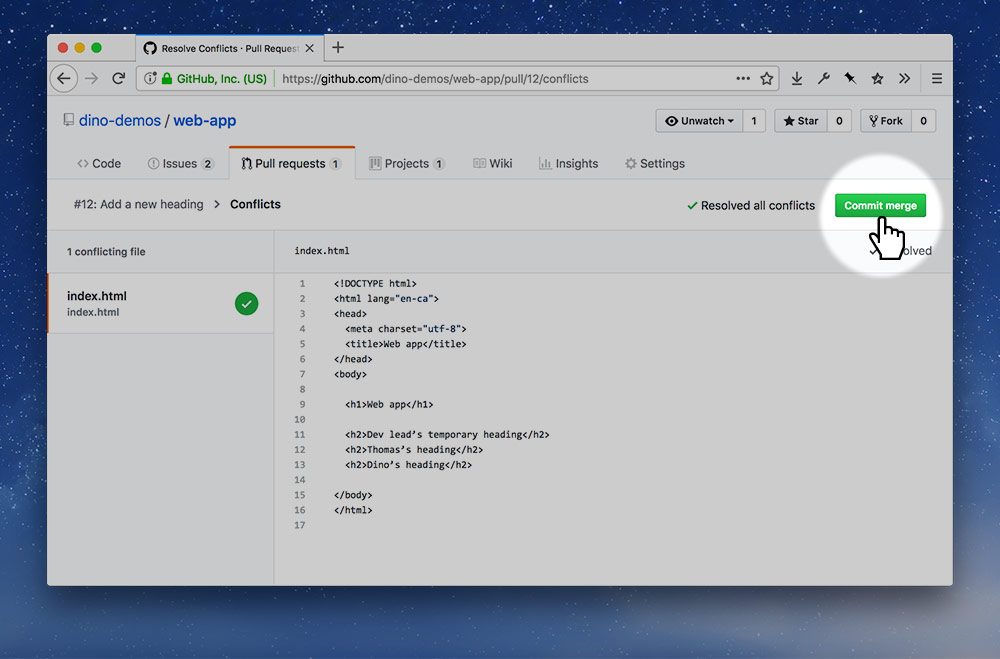
Hopefully we’ll be able to create a conflict so you & your team and see how to solve that too.

This is mainly a task for each team member to do individually at their own pace—but the Dev Lead needs to go through the process first to set some stuff up.

  1. Type it, type it real good

    Remember the purpose of this lesson is to type the code out yourself—build up that muscle memory in your fingers!

1 Pull the changes

Dev

The Dev lead is going to start this lesson, but everybody will do much of it on their own time.

Before you get started on any new bit of code, before you create a new branch, you must pull the recent changes. This assures that your code is the most up-to-date version at the time of branching.

In the GitHub app, press the “Pull” button. Or in the menu go to Repository > Pull (⌘⇧P)

2 Make a new branch

Dev

Inside the GitHub app still, click the branches button and create a new branch named: index-startup

Click the “New” button inside the branches menu.

Name the branch index-startup then press the “Create Branch” button.

  1. Naming conventions

    Don’t forget to follow the naming conventions.

3 Create an HTML file

Dev

In the code folder make a new index.html file. Fill it with the standard HTML boilerplate code & a couple headings.

<!DOCTYPE html>
<html lang="en-ca">
<head>
  <meta charset="utf-8">
  <title>Web app</title>
</head>
<body>

  <h1>Web app</h1>

  <h2>Dev lead’s temporary heading</h2>

</body>
</html>

The headings are really just temporary for this lesson—you will replace them when you start properly coding.

  1. Naming conventions

    Don’t forget to follow the naming conventions.

4 Commit & publish

Dev

Next up, go into the GitHub app and commit the changes to the index-startup branch.

Make a new commit for the creating the basic index.html file.

Next up, publish the branch to GitHub.

  1. Commit conventions

    Don’t forget to follow the Git commit best practices.

5 Create a pull request

Dev

To get the code into the master branch it needs to be approved by our team members—that’s what a pull request allows us to accomplish.

In the GitHub application you can initiate a pull request from the menu: Branch > Create Pull Request (⌘R).

On GitHub’s website add the basic details about the pull request, think of it like an Issue:

  1. Assign it to yourself
  2. Add appropriate labels
  3. Assign it to the Sprint’s project board & milestone

You and even request feedback from a specific team member under the “Reviewers” section.

6 Get a teammate’s review

Any

There are two different interfaces that you might see as a reviewer:

If a teammate is assigned as the reviewer

If the review was assigned to a specific teammate then they’ll see a yellow bar and green button across the top of the pull request.

Press the green “Add your review” button.

If nobody was assigned to review

If the review wasn’t assigned to a specific person, there will be a small link further down the page to be clicked.

Press the “Add your review” link.

Now the reviewer must look at the code and determine if everything is okay or not. The press the “Request changes” or “Approve” and press the “Submit review” button.

7 Merge & delete the branch

Any

Now that the pull request is approved we can merge the code into master and delete the branch.

Press the green “Merge pull request” button.

Press the green “Confirm merge” button.

Press the subtle “Delete branch” button.

  1. Automation

    Remember that our project board will automatically move Issues & Pull Requests from the “In review” column to the “Done” column with the Pull Request is closed.

8 Delete the local branch

Dev

Now the Dev Lead needs to delete their local copy of the index-startup branch.

In the menu, go to Branch > Delete.

Make sure to confirm the branch deletion.

9 Pull the changes

All

Now everybody on the team should do these steps individually. If everybody does it at the same time we’ll get a higher chance of creating a conflict so I can help show you how to solve it.

Pull the changes the Dev Lead made into your own local repo.

Press ⌘⇧P—or the “Pull” button.

10 Make a new branch

All

We cannot write code directly to the master branch & we shouldn’t. So we, each individual teammate, needs to make a new branch on their own GitHub Desktop app.

For keyboard shortcut pros: ⌘⇧N

Name the branch something unique to you.

11 Code, commit, publish, pull request, review & merge

All

Now that everybody has the index.html file in their website—and has a new branch—everyone should open up the code and add a new heading.

⋮
<body>

  <h1>Web app</h1>

  <h2>Dev lead’s temporary heading</h2>
  <h2>Thomas’s temporary heading</h2>

</body>
</html>

Then follow all the steps necessary to get this code onto GitHub’s website.

(For screenshots, refer the the steps above.)

  1. Commit to your new branch
  2. Publish the branch
  3. Create a pull request
  1. Automation

    A fun little tidbit to now about: if you write Fixes #23 or Closes #58 inside the commit message description it will automatically close the associated Issue. The number is the Issue’s number that can be found right at the top of the Issue screen.

  2. Line G

    Everybody should add their own heading immediately after the Dev Lead’s <h2>

12 Resolve conflicts

Any

If all goes to my devious plan one of you should run into a conflict and cannot review or merge your pull request.

You should see a screen like this with the “Resolve conflicts” button.

Pressing the button will take you to the conflict resolution screen.

On this screen you should see the two different chunks of code highlighted. Git couldn’t automatically merge the code together because the same line of code was edited by multiple people.

It’s up to us to decide which piece of code to keep and then delete the other piece and the separators.

This is an actual code editor, so start deleting the code and making it look the way that it should look.

Press the “Mark as resolved” button.

Then press the “Commit merge” button.

13 Review, merge & delete branches

Any

Now we can finish off the final steps to the task:

(For screenshots, refer the the steps above.)

  1. Someone review your code changes
  2. Merge the pull request & delete the branch
  3. The original author should delete their local branch

And everybody must pull when everyone else is done their changes.

At the end everybody should have the index.html file with everybody else’s headings in the list.