To get started on this project we need to download an Illustrator file that we can manipulate & export.
Download these files.
Now create the following folder structure on your computer:
A quick look at properly setting up an Illustrator file for exporting to SVG.
To get started on this project we need to download an Illustrator file that we can manipulate & export.
Now create the following folder structure on your computer:
The folders are used for the following purposes:
prod — (short for production) to keep perfect assets ready for exporting, in case they need to be changedwww — this is your GitHub repository, where all your HTML & CSS files are (we’re not using GitHub right now)www/images — this is where the exported, smushed files goIllustrator documents SHOULD NEVER be committed into your GitHub repository.
Don’t forget to follow the naming conventions.
The artboard in Illustrator is extremely important, for two reasons:
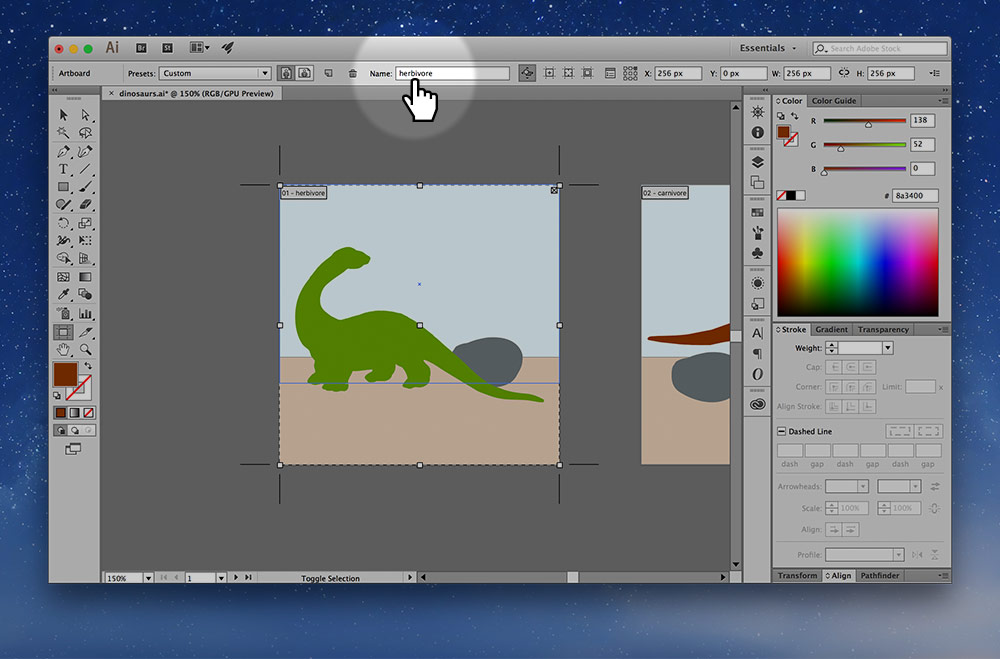
Rename the two artboards: “herbivore” & “carnivore”.
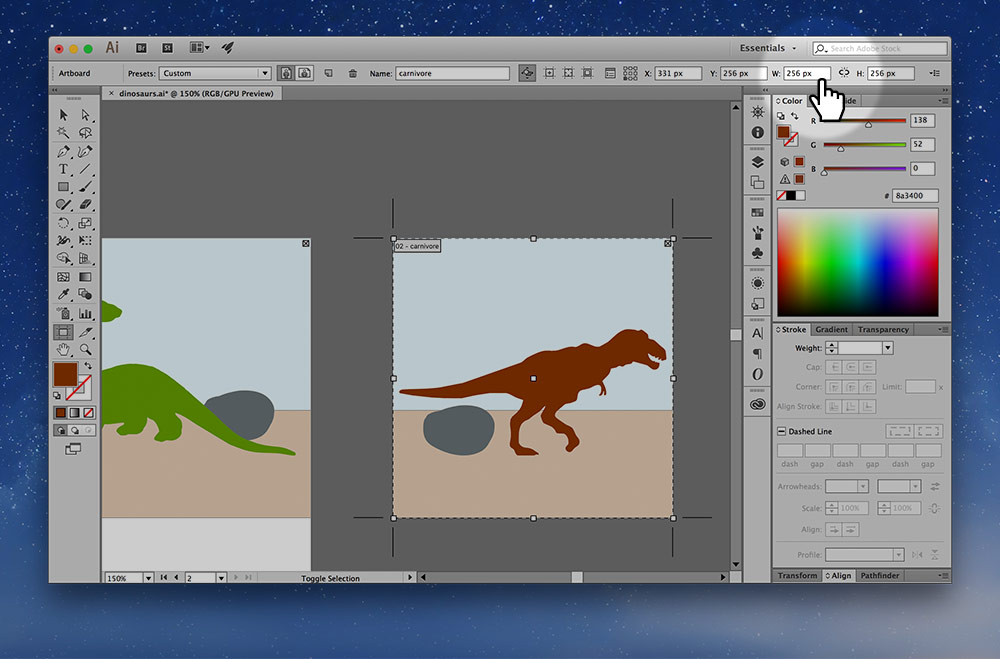
Change the dimensions of the artboard to exactly “256 × 256”. I like to use 256 as a good starting size for SVG artboards.
We want to make sure the artboard perfectly matches the artwork—if there extra spaces around the artboard, those will cause the SVG to look funny.
You can use the Object > Artboard > Fit to Artwork Bounds menu option to make it faster—but sometimes I don’t like the artwork touching the sides of the artboard.
Don’t forget to follow the naming conventions when naming your artboards.
Naming the layers in Illustrator can be super helpful, especially when we animate and make the SVGs interactive.
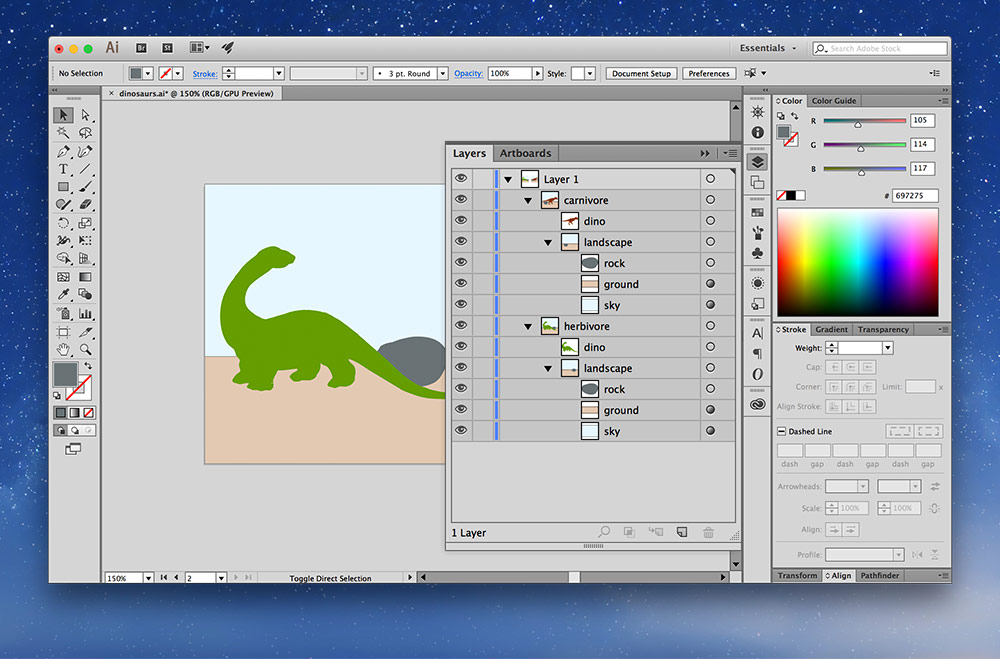
The names of the layers will export into the SVG as id attributes that we can target with CSS & JavaScript.
It’s also a really good idea to group things together—those groups will be represented in the SVG as different tags.
Don’t forget to follow the naming conventions when naming your layers.
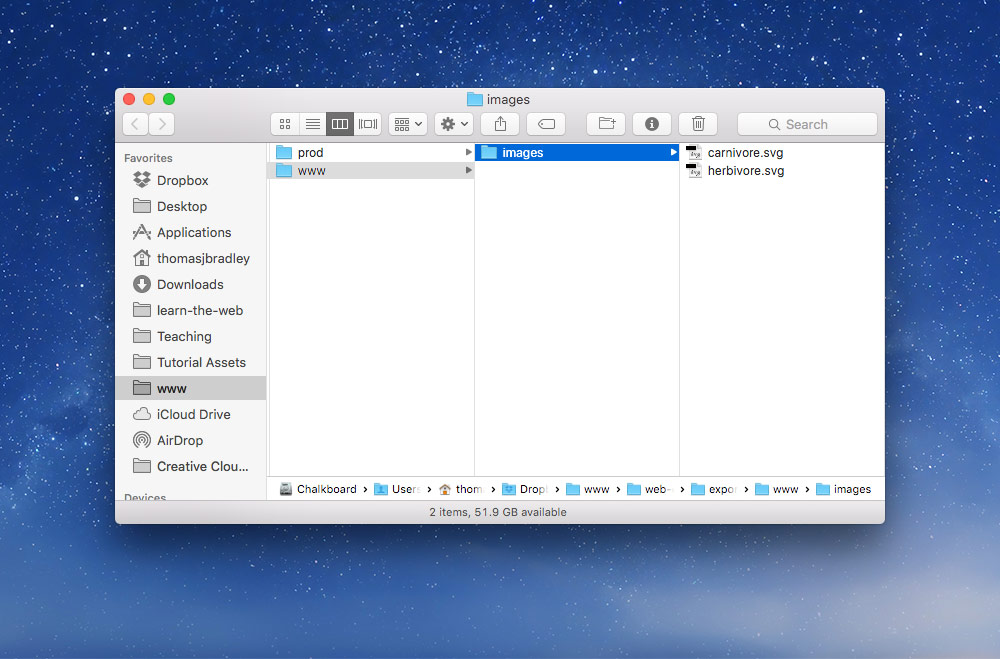
Now that our Illustrator file is set up properly we’re ready to export the SVGs.
Illustrator should have exported the files for us and we can see them in our images folder:
Never edit the SVG after it has been exported—that’s why we save the AI file. AI files are for editing, SVG files are for using on the website.
We want to make the SVGs we use on the web as small as possible—Illustrator only does part of the job.
Next up we need to drop the images into Spritebot to really reduce their file size—it won’t reduce the quality in any way.
![]()
You don’t have to save the files or anything, Spritebot will just overwrite your graphics with ones that are smaller size.
Now we have super small, super optimized graphics for our website that will help it load quickly.
You can go ahead and use these graphics in your HTML & CSS how you’re used to.
Drop the final, coded exercise into Markbot and fix all the errors until Markbot gives you all green (and maybe a little yellow).
After you’ve fixed all the problems, go ahead and submit the assignment. You’ll immediately get your grade.