We’ll have a fully functional application that moves a circle around the screen.
This is what it should look like when it’s done:
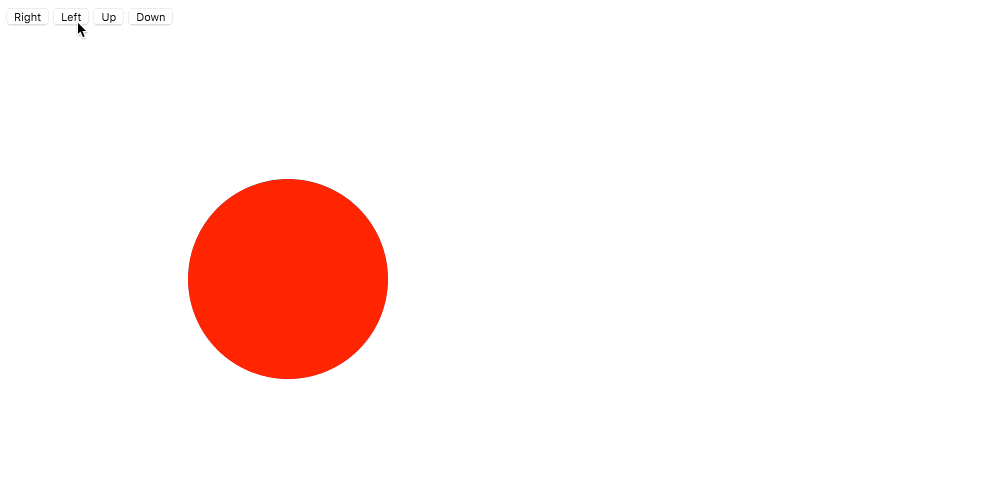
Use jQuery & CSS to make a small application that will move a circle around the screen with up, down, left & right buttons.
We’ll have a fully functional application that moves a circle around the screen.
This is what it should look like when it’s done:
Remember the purpose of this lesson is to type the code out yourself—build up that muscle memory in your fingers!
Start the lesson by forking and cloning the circle-mover repository.
Fork & clone the “circle-mover” repo.
The repository will have some starter files to get you on your way and include requirements for Markbot so you can be sure you’ve completed the lesson.
This includes some starter code that you can get by forking and cloning the repository. You’ll use Markbot to double check everything is done properly.
Before we get started, create some files and get ready.
index.html & add the boilerplate code.main.css in your css folder & add the boilerplate code.main.js in your js folder & connect it to your HTML.Don’t forget to follow the naming conventions.
Create the boilerplate with html5, viewport, css & jss
Create the boilerplate with borderbox
We’re going to need a couple HTML elements to make this work: a <div> and a <button>
<!DOCTYPE html>
<html lang="en-ca">
<head>
  <meta charset="utf-8">
  <title>Circle mover</title>
  <meta name="viewport" content="width=device-width,initial-scale=1">
  <link href="css/main.css" rel="stylesheet">
</head>
<body>

  <button id="btn-right">Right</button>
  <div class="ball"></div>

  <script src="https://cdnjs.cloudflare.com/ajax/libs/jquery/3.2.1/jquery.min.js"></script>
  <script src="js/main.js"></script>
</body>
</html>
The <button> tag should only be used for JavaScript or forms—it does not link to other pages.
We’re going to use CSS to make this <div> look like a circle.
With a touch of CSS we can transform the <div> into a circle (because that’s totally necessary).
html {
  box-sizing: border-box;
}

*, *::before, *::after {
  box-sizing: inherit;
}

.ball {
  width: 200px;
  height: 200px;
  position: absolute;
  top: 200px;
  left: 200px;
  background-color: red;
  border-radius: 100px;
}
With our HTML & CSS in place, this is what we should be seeing:
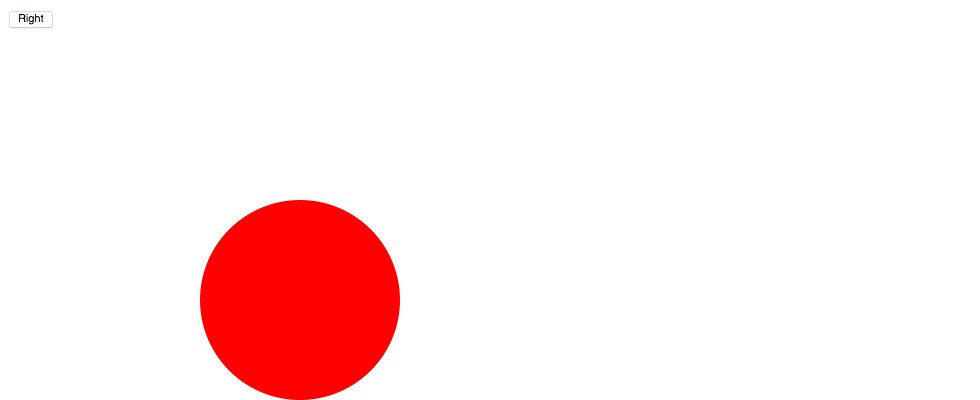
Using position: absolute is really important here because we want to be able to the move the circle around the screen with coordinates.
Now that we have all the HTML & CSS in place we can make the button work by adding a little JavaScript.
var $ball = $('.ball');

$('#btn-right').on('click', function () {
  var newLeft = $ball.offset().left + 10;
  $ball.css('left', newLeft);
});
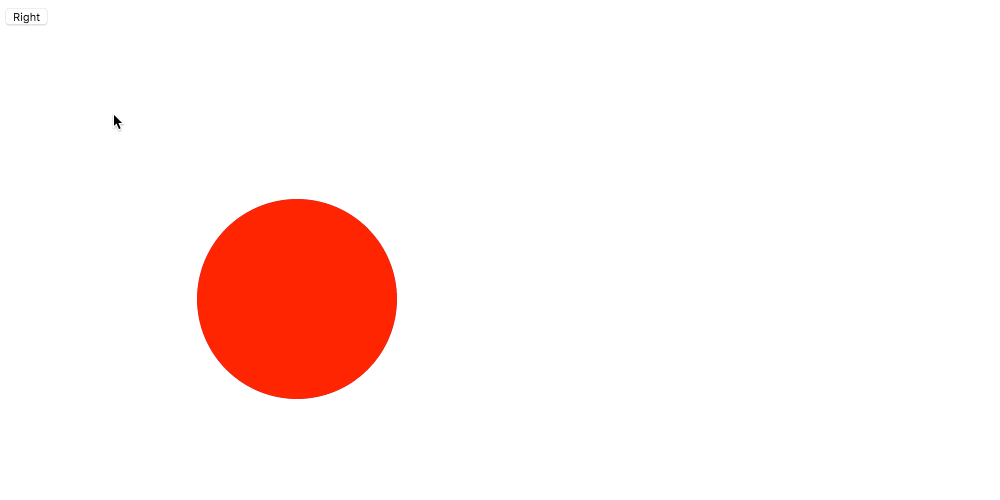
With a refresh in your browser you should now be able to click on the “Right” button to move the circle.
jQuery provides a function called on() that allows us to listen to events.
click event.With the offset() function we can get the exact pixel coordinates of an element on screen. It returns the left and top positions.
Here we’re adding 10 onto the left coordinate, making it move rightwards.
jQuery’s css() function allows us to change CSS properties and values directly, overwriting what’s inside our CSS file.
leftIt’s time to finish of the rest of the functionality so the circle can move in all four directions.
<button> tags in HTML: “Left”, “Up” & “Down”.Use a CSS property we’ve learned before—no JavaScript—to make the ball animate from position to position instead of just snapping.
Drop the final, coded exercise into Markbot and fix all the errors until Markbot gives you all green (and maybe a little yellow).
After you’ve fixed all the problems, go ahead and submit the assignment. You’ll immediately get your grade.